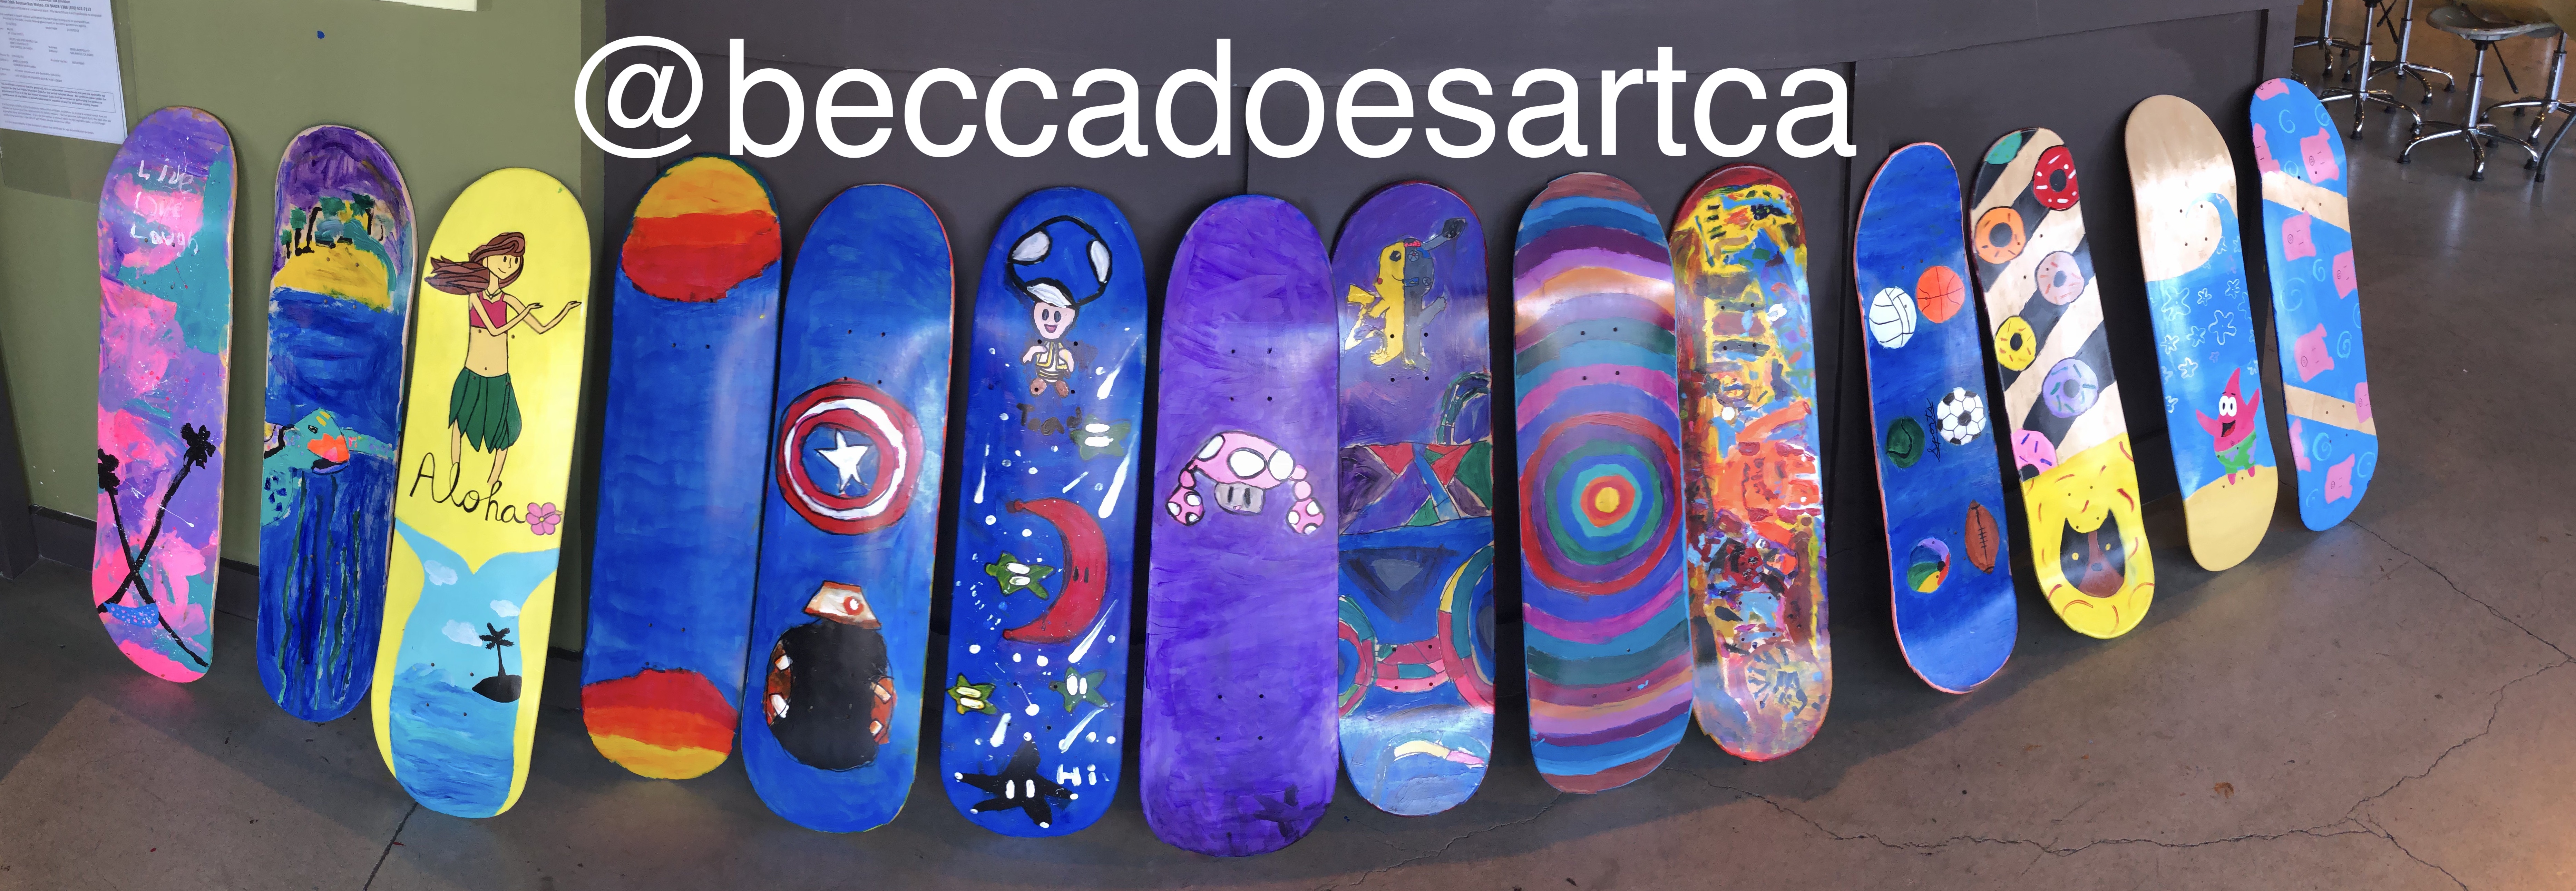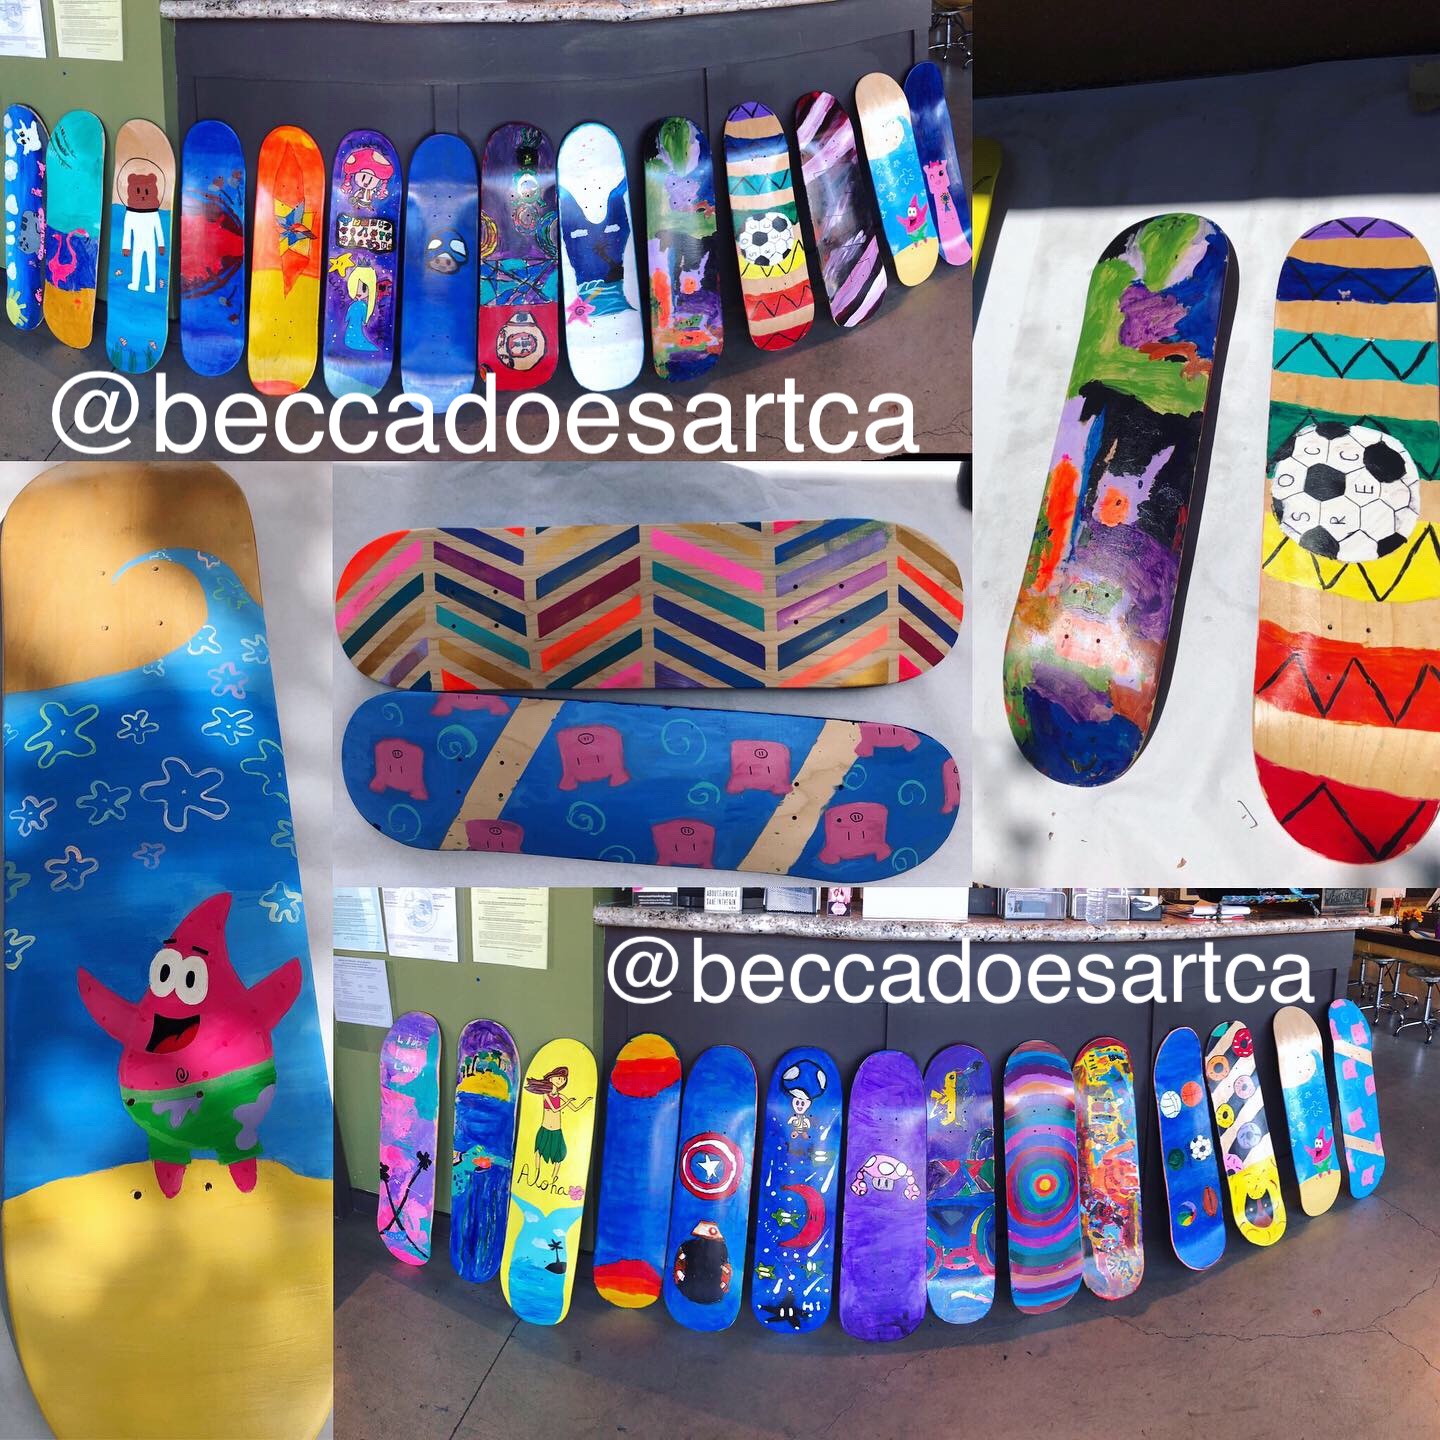
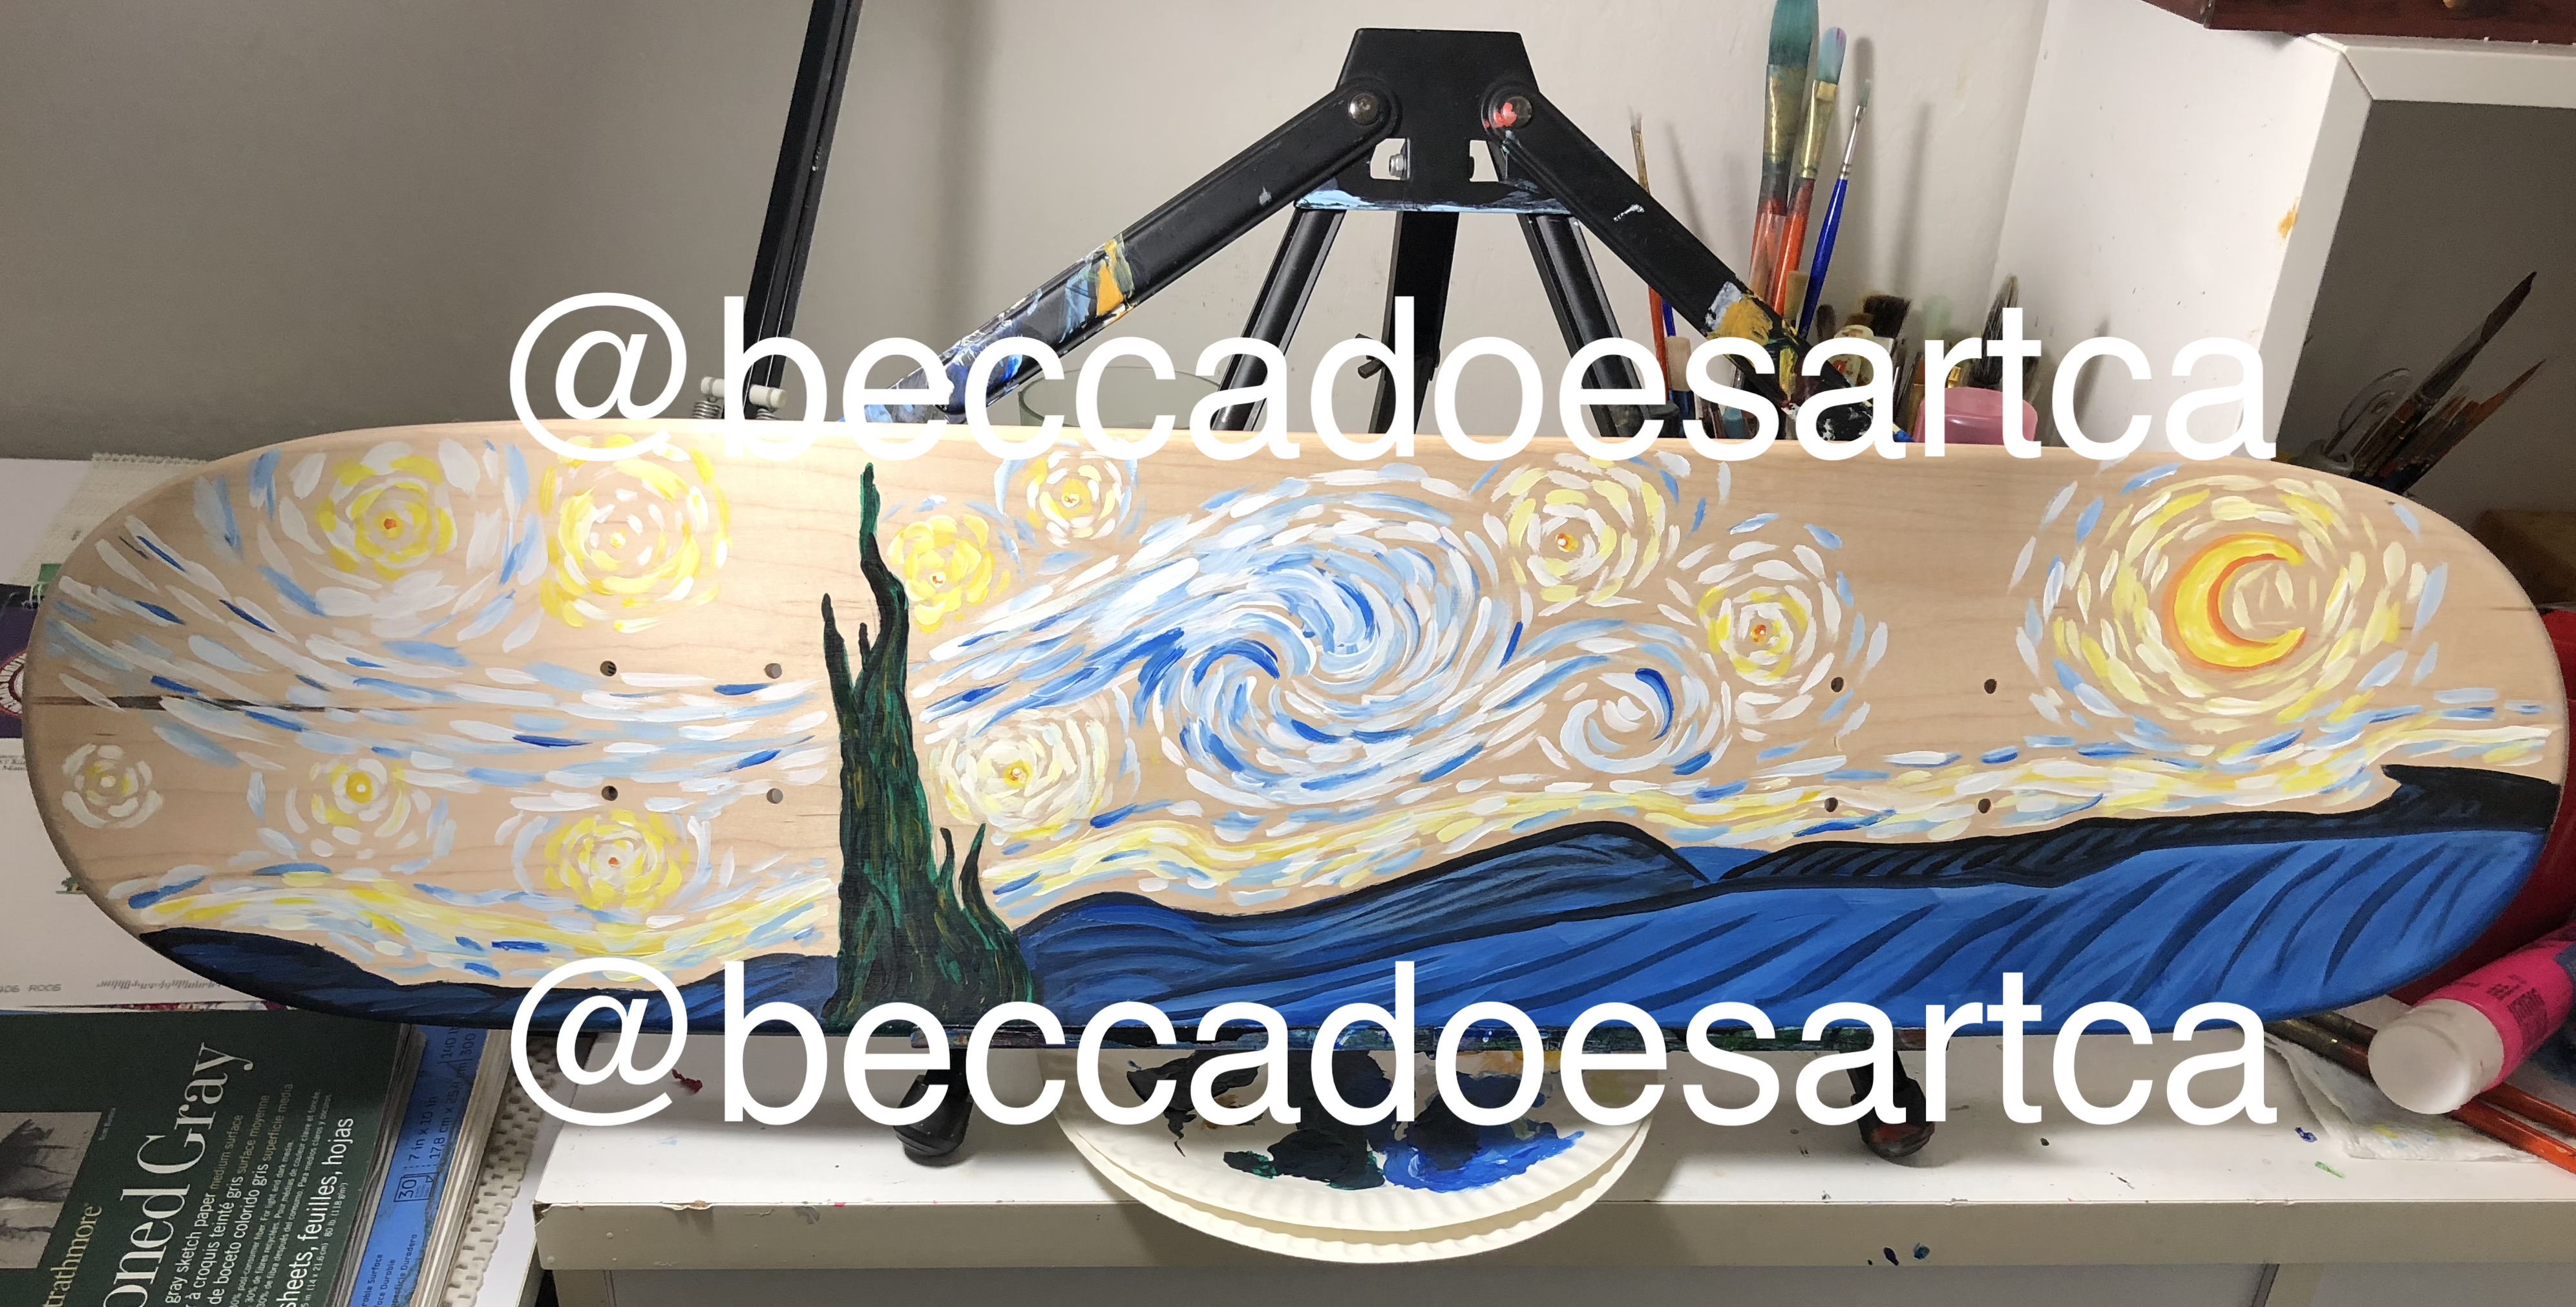
One of the studio’s most beloved weeks; skateboards! This project is special because unlike most projects I do which are one-off single sessions, campers work all 5 days designing and painting their boards. These are real maple wood decks that are ready to put on hardware. In the past we have primed the boards before the kids began sketching and painting. This session however, we left the boards un-primed (at my request) which allowed the awesome wood grain to show through when I varnished them. I also Allowed one side of my sample starry theme board to show the wood grain through.
DESIGN AND SKETCH ON PAPER
For this project, the first two days are spent designing, sketching and painting out the design for the board on paper. We take a skateboard and trace around it twice for front and back on large paper. I printed out several skateboard samples for the kids to look at brought in my sample board. Then I went around the room one by one and printed any reference material they might need; animals, super heroes and video game characters are always popular requests. Once the kiddos have traced it all out, then they can practice painting it on the paper. This helps a lot of kids understand they need to draw bigger. This usually takes up the first two days of class.
SKETCH & PAINT THE BOARDS
Only after they have completely drawn and painted out the concept on paper, then they begin sketching onto each side of the boards. Then begin painting onto the boards, starting with the top side; that way you can paint the bottom part even if the front is still wet since it is curved. This takes up the last days. Ideally, I want them to finish on Thursday so I can start sealing the boards with a clear gloss varnish.
{PRO-TIP} When painting skateboards: Paint the flat top side of the board FIRST, that way they can begin painting the bottom side even if the top isn’t dry quite yet since it has a curve.


5 cans of clear spray gloss later and I had them all sealed and ready to go. Some other artists prefer to use a paint on varnish with a brush. I’d say both have their advantages and disadvantages. You just want a multipurpose varnish for wood and acrylic use. Either one you choose, you want to make sure you are varnishing outside or in a very very very well ventilated area. I always wear a mask as well. I also warn parents to keep the fresh sealed boards outside or in the garage for a couple of days… especially for my last minute finishers whose boards got sealed one minute before departure. I absolutely love this project and can’t wait for it again in the fall!