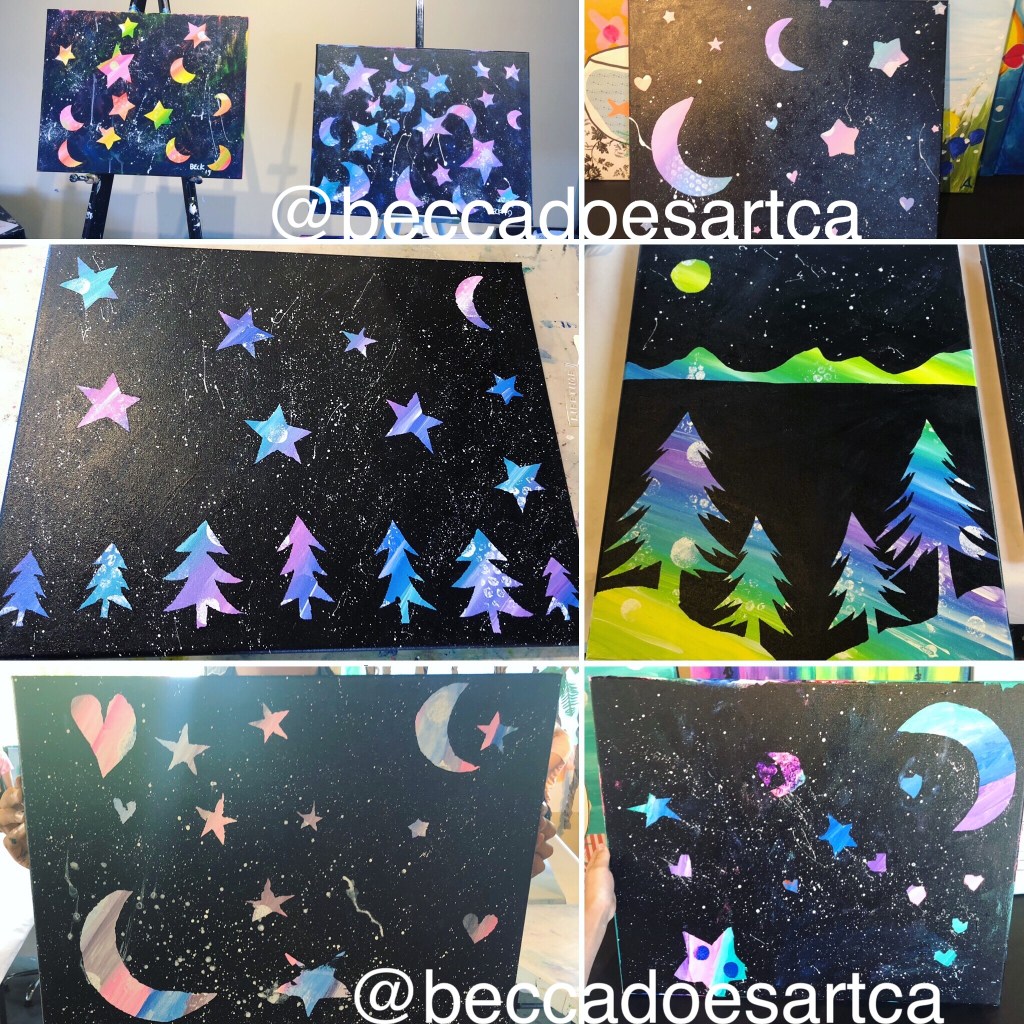
I first came across the idea of using contact paper as a resist when refinishing some furniture. I’ve since done several different versions of resists, some with mixed media, like my Birds and Words project. I like the idea of having one for each season so, in addition to redoing the leaves for fall like once before, and snowflakes for winter! Having a sample to show this project is essential. It can be hard for some younger kids to wrap their heads around what we are trying to do with the project, but peeling off the “stickers” to reveal the final project is always magical, and who doesn’t love a little splatter painting? So now: Contact Paper Resist Stars and Moon.
COLORFUL BACKGROUNDS
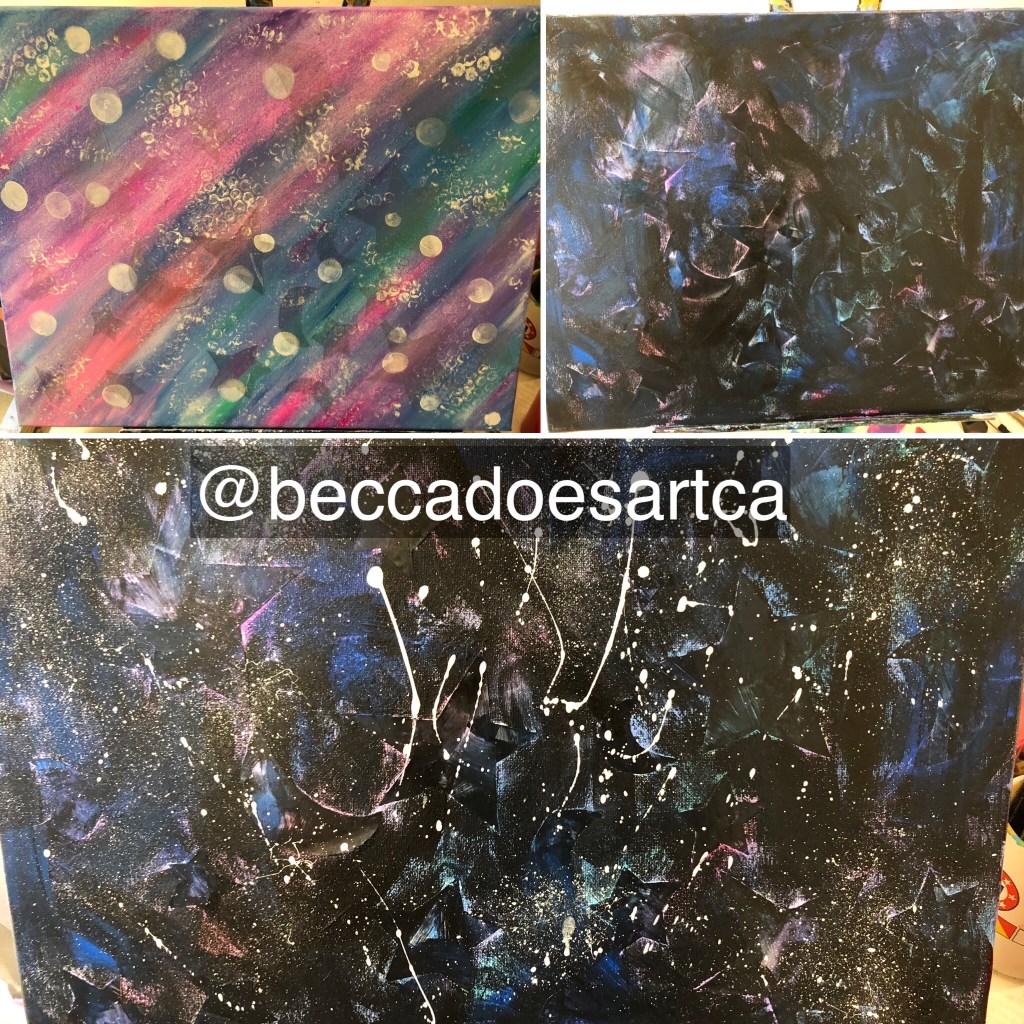
The first step for this project is covering your background in colorful colors and textures. In addition to size 8 filbert brushes, I also gave the kiddos foam circle brushes and bubble wrap to paint with too. We all choose our colors (except black of course), then paint the entire background in fun colors and textures and dry. I showed them how I painted mine, but the only rules were to use at least two colors plus white and use at least one tool not a paintbrush.
{PRO-TIP}Black paint can ruin a paint pallet very quickly. For little ones, wait to put out black until the end or put just a small amount out when you need it. Don’t give them black at the start!
CONTACT PAPER “STICKERS”
Next each kid gets a roughly 8″ x 11″ pre-cut piece of contact paper [we call it “sticker” paper] to draw out stars and moons (and hearts and trees!) Because paper and paint don’t mix, we did our drawing and cutting at our snack table. I reminded each kid to trace their design on the back of the contact paper; the part with the squares. I put out the smaller star and moon stencils we have and made a couple extra in varying sizes out of cardboard that the kids could trace around.
Once the “stickers” are cut out, make sure the background is completely dry (if any wet spots remain – a hair dryer works well to speed along the drying process) then carefully peel the stickers and place flat onto the canvas. We talk a little bit about what a resist means and talk about using tape or other things to mask out areas in art. It’s at this step, I make sure to remind the kiddos that this is where the color will stay ONLY where the stickers are. So if they have any particular parts they are fond of that they want to show through; make sure to put the “stickers” on those areas. I also show them how I make sure to put my “stickers” over parts with more than one color showing. This is the part the younger kids seem to have the hardest time with. Make sure each kid lays them flat and no edges are flopping up; this is super important for the next step.
BLACKOUT, DRY & PEEL
Once I check all the stickers are flat (and help little ones cut and apply) it’s time to get our dark paint. I actually used black with cobalt blue added to mine, but gave the kids option to use just black as well. I make sure everyone waits to start with me, since there is a bit of a trick to painting over the stickers.
To paint the background you want to paint over & around the stickers FIRST, then fill in the spaces in between. Find one sticker to start with, starting from the middle of the sticker paint with outward strokes; away from the sticker and on the the canvas area about an inch around it. It almost looks like painting a flower. its not super important to cover the whole sticker since they will be peeled off anyway, but most of the kids like to. After ALL the stickers have been painted over, then fill in the blank space in between. Then for the last touch, if they choose, I set up a little splatter station on the stage. Unless you also want splattered kids; its best to do that one at a time in a designated area!
{PRO-TIP} Splatter painting is super fun and kiddos love it! However they often end up splattering each other (which they don’t usually mind) or on each other’s projects (which they DO indeed mind). Because of this, I usually wait to do splatter as one of the last steps, one or two kids at a time, in a designated area.
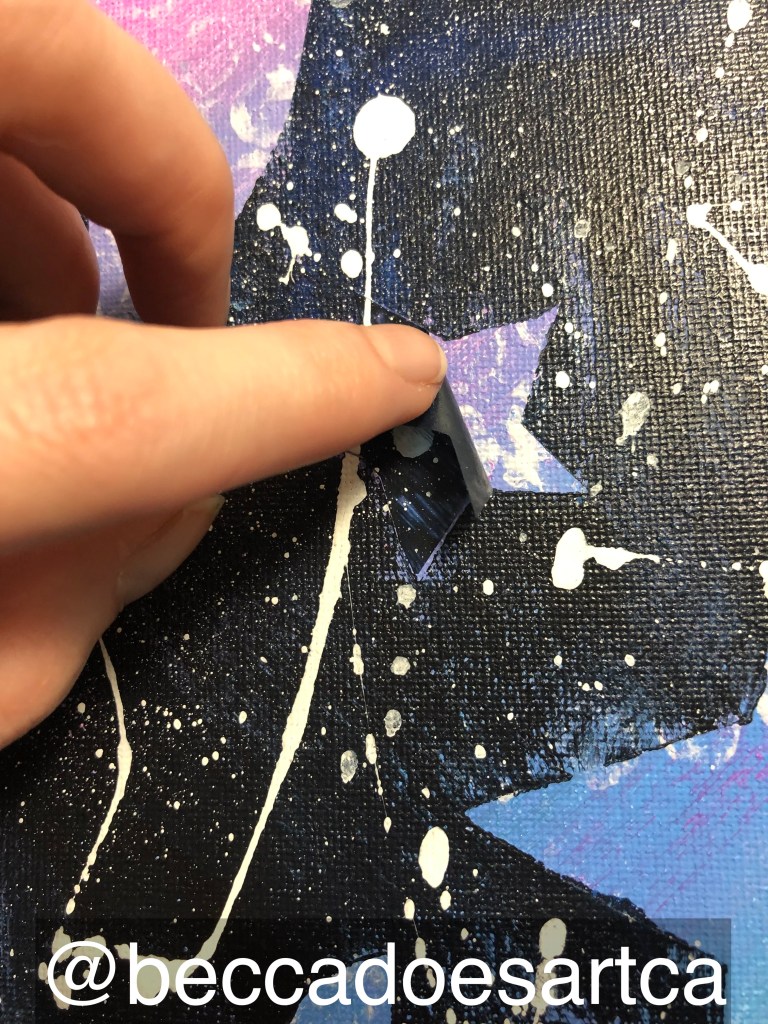
Once the painting dries, the “stickers” can be peeled off from the edges, revealing the color in the background. A bit of warning if you choose to force dry with a hair dryer; don’t focus the air on just one sticker as it could cause it to curl up. Also oddly enough; the cheap knock off I bought at the Dollar Tree seemed to hold up better than the branded kind from the hardware store. I usually leave my stickers from my sample on and let each kid peel one off to get the hang of it. This is absolutely everyones favorite step!
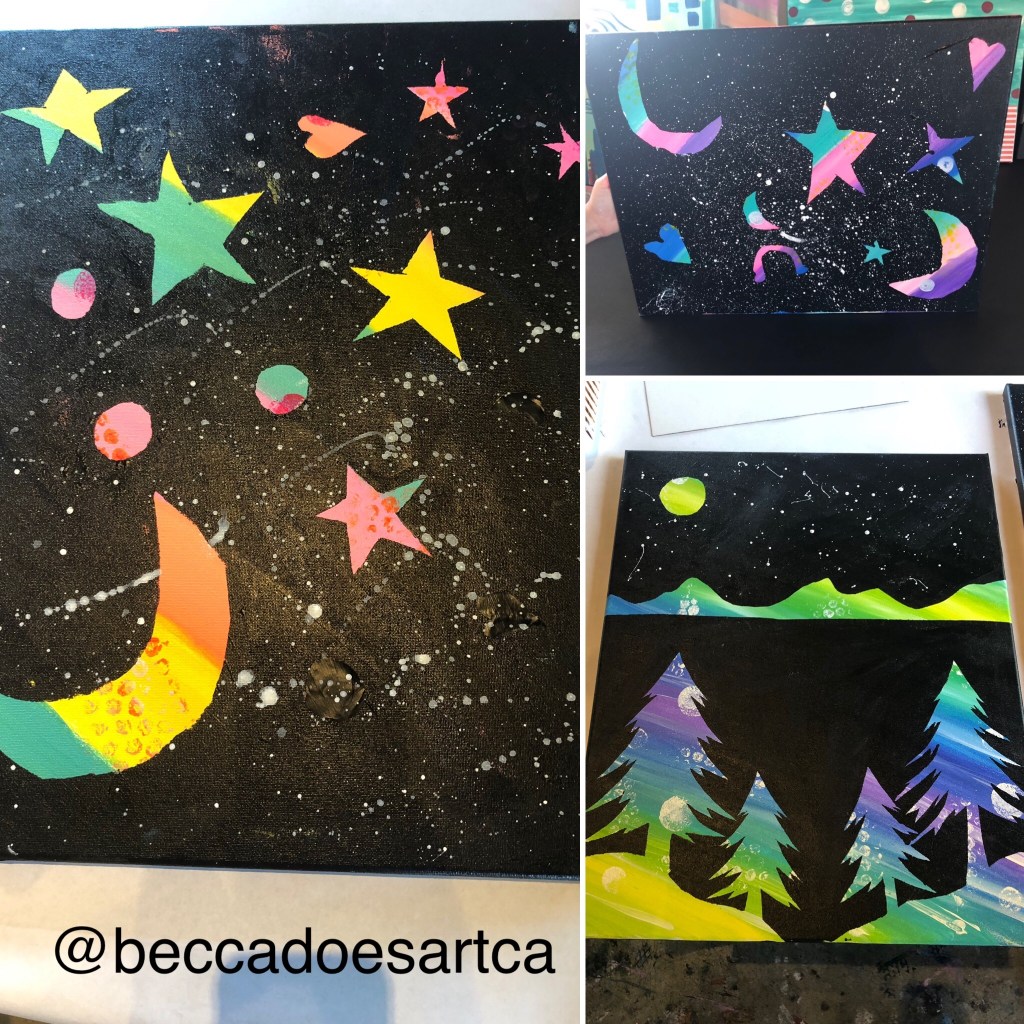
Some kids chose to save the “stickers” and use them to make cards, or on paper art work. I also let them have any leftover paper to make custom stickers with markers after the project if they wanted.
I love these resist projects and for sure will be doing more in the fall. Coming up next a painted peacock with a mixed media feather tail.
